

About this item
VEVOR 20W 12V Solar Panel Battery Charger
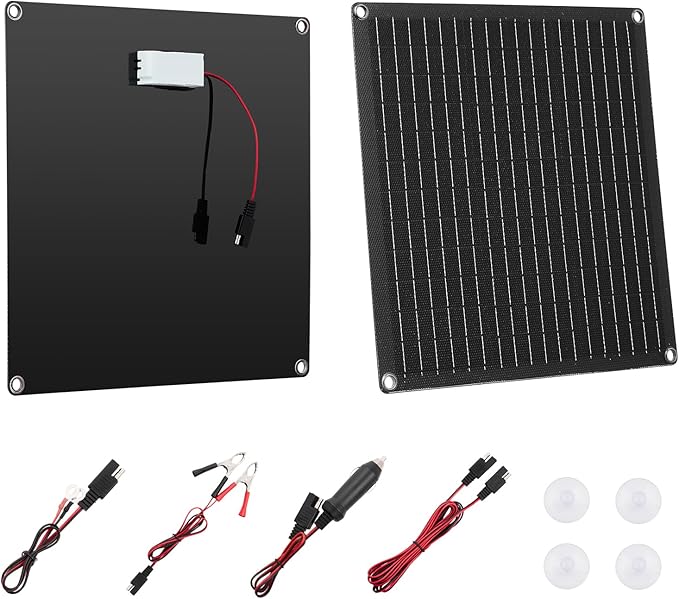
The VEVOR 20W 12V Solar Panel Battery Charger is a compact and affordable solar charging solution designed for maintaining and charging 12V batteries using clean solar energy. Ideal for outdoor, automotive, and off-grid applications, it delivers steady power to 12V lead-acid, gel, AGM, or lithium batteries while helping reduce reliance on traditional grid charging.
This panel serves well for battery upkeep, trickle charging, and supplementing small solar systems in boats, cabins, RVs, and remote locations.
Key Specifications
| Feature | Details |
|---|---|
| Power Output | 20 Watts |
| Operating Voltage | 12V system |
| Compatible Batteries | Lead-acid, gel, AGM, lithium |
| Solar Cells | Monocrystalline (high efficiency) |
| Material | Tempered glass with aluminum frame |
| Connector Type | Standard solar panel connectors |
| Mounting | Pre-drilled holes for simple installation |
| Use Case | Battery charging & maintenance, small solar setups |
| Weather Resistance | Outdoor-ready (weather-resistant) |
Design & Build Quality
The VEVOR 20W solar panel features a durable aluminum frame and tempered glass surface that protect the solar cells from outdoor wear and minor impacts. Its lightweight and compact design make it easy to mount on RVs, boats, sheds, or garden areas without requiring elaborate mounting gear.
Pre-drilled holes allow simple and quick installation on flat surfaces.
Performance & Charging Capability
With a 20W power rating for a 12V system, this solar panel delivers steady, reliable power — especially suited for trickle charging and battery maintenance rather than high-load use. It maintains battery charge during periods of inactivity and can top up batteries over sunny days.
Performance highlights:
Charges and maintains 12V batteries
Helps prevent battery drainage during storage
Supports a range of battery types
Consistent power output in direct sunlight
Actual charging performance varies with sunlight intensity, panel tilt, and weather conditions.
Installation & Setup
Installing the panel is straightforward:
Choose a location with ample sunlight exposure
Mount the panel using the pre-drilled holes
Connect panel output to a charge controller (recommended)
Connect to battery terminals
Using a proper solar charge controller is recommended to prevent overcharging, especially with sensitive battery types like lithium.
Pros & Cons
| Pros | Cons |
|---|---|
| Compact and lightweight | Low power output for heavy loads |
| Ideal for battery maintenance | Best performance requires direct sunlight |
| Supports multiple battery types | May need a charge controller for safe long-term use |
| Easy installation | Not suitable for powering large devices |
| Affordable solar charging | Output varies by weather conditions |